Tags
Tags are keywords associated with your product that allow users to find products associated with that keyword. Tags help customers to find products through online store search and you can also use them to make automated collections.
Remove product tags
To remove tags that have been previously added to the product, you need follow these steps:
- On your Shopify admin, click on Products
- Select a product’s name
- In the Organization section, click on the ‘x’ beside the name of the tag that you want to remove
- Click on Save
Add product tags
To add tags to a product, you need follow these steps:
- On your Shopify admin, click on Products
- Select the product you want to add a tag to
- In the Organization section select or enter the tags for that product using a comma to separate different tags. Any new tags will be created:
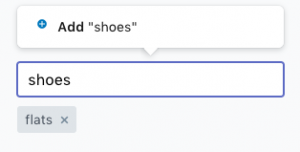
- Click on Save
Add/Remove tags in Bulk
You can also add or remove tags as a bulk action. To do that, you need to follow these steps:
- On your Shopify admin, click on Products
- Select the products that you want to add a tag to or remove a tag from. There are 3 ways to select the products:
- Select items one by one:
Click the checkbox beside each item you want to select
- Select a range of items:
Click to select one item and then hold the Shift key and click on another item. This will select the first and last items you clicked and all the items in between
- Select all list items on a page:
Click on the master checkbox to select every list item on a page
- Click the Bulk action button
- Select Add tags or Remove tags depending on whether you want to add or remove tags
- Add the tags or remove the tags as per your needs
- Click on Apply changes
